Setup guide · macOS
Installing the Greenlit Studio VST3 in Reaper
The plugin ships inside Greenlit Studio — it doesn't install itself into Reaper's plugin folder automatically. Four steps, done once per machine.
In Greenlit Studio
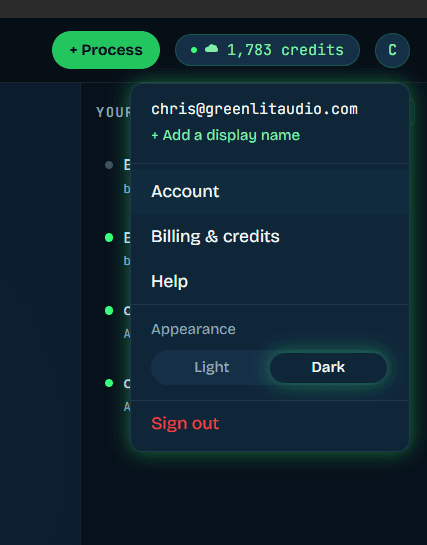
Open your account menu
Inside the Greenlit Studio desktop app (not the website in a regular browser — the install button only renders inside the app), click your account icon in the top right, then choose Account.
In Greenlit Studio
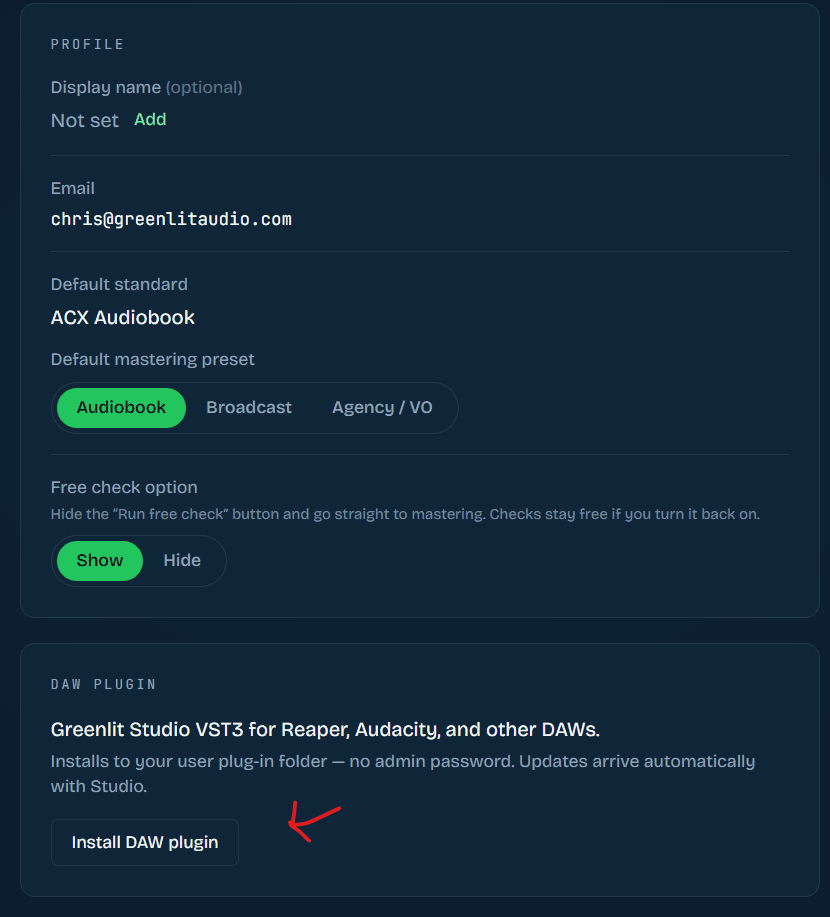
Install the DAW plugin
On the Account page, scroll down to the DAW plugin card and click Install DAW plugin. The first run copies the mastering engine alongside it — takes about a minute. Updates after this are automatic; you won't need to repeat this step on future Studio versions.
In Reaper
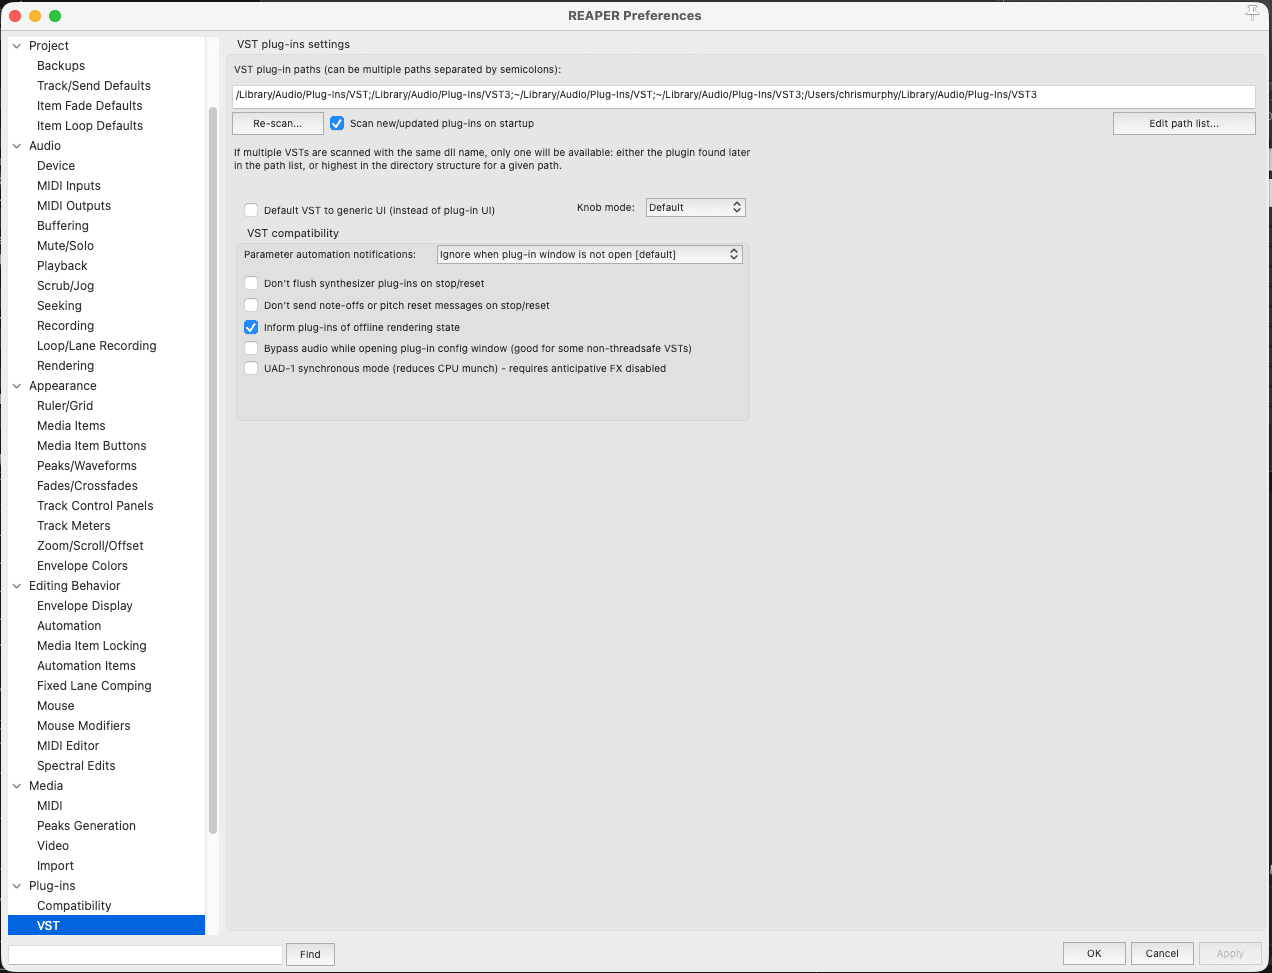
Open the VST path settings
In Reaper, go to Reaper → Preferences → Plug-ins → VST (or press ⌘,). Click Edit path list… in the top right of the VST plug-ins settings panel.
In Reaper
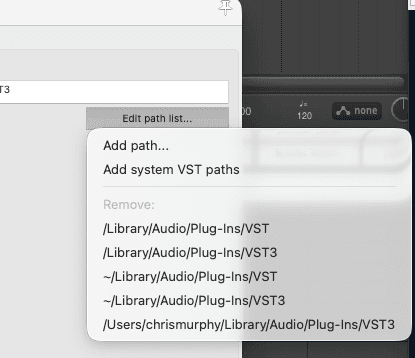
Confirm the path, then rescan
Make sure ~/Library/Audio/Plug-Ins/VST3 is in the list — that's where Studio installs the plugin. If it's missing, choose Add path… and add it. Then close the dialog and click Re-scan… back on the VST page.
If it still doesn't show up
- It's listed under the manufacturer name Greenlit Audio, not “VST3” — search “Greenlit” in Reaper's plugin browser rather than scrolling.
- Fully quit and reopen Reaper after rescanning — a running instance can hold a stale plugin cache.
~/Library/Audio/Plug-Ins/VST3is usually already in Reaper's default path list, so step 4 is often just a check, not an edit.